How to Perform: Stereotactic (Mammographic Guided Biopsy)
By Keon Mahmoudi, MD and Tejas Manchandia, MD
The following guide is meant to serve as a general overview of stereotactic (mammography-guided) breast biopsies. Depending on institutional preferences and equipment used, there may be mild variations in the steps for the procedure.
Step 1: Pre-Procedure
- Determine the best approach to target the lesion, typically via the shortest skin-to-target route, using the diagnostic study that prompted biopsy.
- Determine if the biopsy will be performed with the patient in prone or upright position. The latter will be discussed below.
- Discuss the risks, benefits, and alternatives to the procedure with the patient.
- Obtain written and verbal consent from the patient.
- Technologist brings the patient to the procedure room.
Step 2: Pre-Procedure Imaging
- Radiologist performs time out and confirms patient identify, procedure, and side.
- Technologist places breast in compression and takes a tomosynthesis scout image (if targeting with tomosynthesis guidance) or scout image and stereotactic pair (if targeting with 2D stereotactic guidance).
- Radiologist confirms appropriate compression of breast tissue, appropriate visualization of biopsy target, and performs adjustments if necessary (Figure 1).
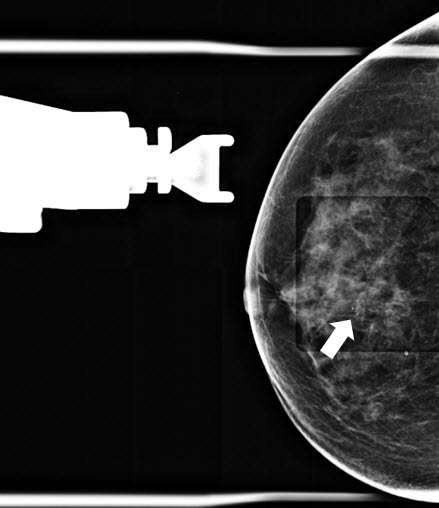
Figure 1. Craniocaudal (CC) tomosynthesis scout image of the right breast shows coarse heterogeneous calcifications measuring 5 mm with grouped distribution at 12 o’clock at middle depth located 4 centimeters from the nipple (arrow).
- If targeting with tomosynthesis guidance, the radiologist identifies the target site on the computer monitor, clicks on the area of interest, and confirms the computer-calculated X, Y, and Z coordinates with the technologist. If targeting with 2D targeting, the radiologist clicks on the area of interest on the first image, then clicks on the other image and clicks on the area of interest prior to creating the target and confirming the coordinates with the technologist.
- Radiologist confirms adequate stroke margin (Figure 2) and selects the appropriate needle size (petite or standard), depending on breast compression thickness and location of the target.
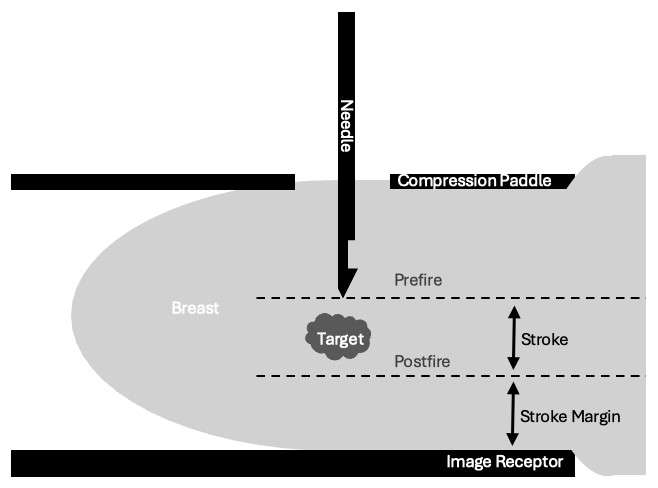
Figure 2. Visualization of stroke margin.
Step 3: Procedure Preparation
- Prepare the biopsy site in the usual sterile fashion.
- Technologist loads the needle onto the stereotactic device and positions the needle tip near the skin surface.
- Radiologist achieves local anesthesia along the expected course of the biopsy needle using a combination of lidocaine (superficial tissues) and lidocaine with epinephrine (deep tissues).
- Radiologist manually advances the needle to the pre-fire position (until the X, Y, and Z differential cells read 0, 0, 0 and are green in color).
- Technologist takes a stereotactic pair of images (+/- 15 degrees) and radiologist confirms accurate trajectory (Figure 3).
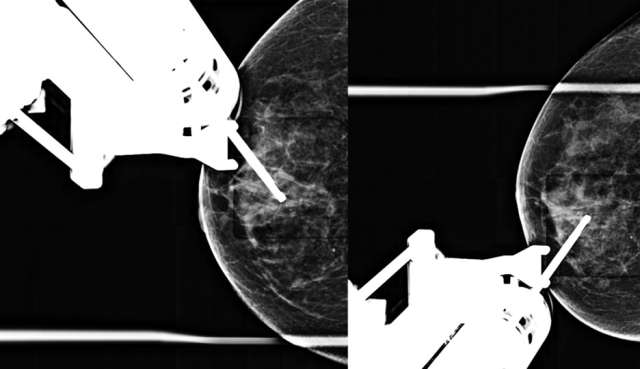
Figure 3. Prefire stereotactic pair of CC images taken +/- 15 degrees.
- Radiologist warns patient about popping noise.
- Radiologist fires the needle with plunger.
- Technologist repeats stereotactic pair (+/- 15 degrees) and radiologist confirms accurate trajectory on the postfire images (Figure 4).
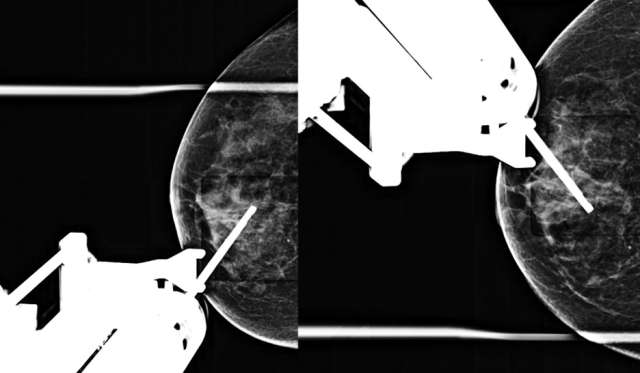
Figure 4. Postfire stereotactic pair of CC images taken +/- 15 degrees oblique.
Step 4: Biopsy
- Technologist ensures vacuum-assisted biopsy device set to biopsy mode.
- Radiologist holds down foot pedal to initiate sampling and rotates the needle each time the machine beeps. Typically, biopsies are obtained at 12, 10, 8, 6, 4, and 2 o’clock, but different clock positions may be biopsied as indicated based on the location of the target in relation to the position of the needle. Radiologist lifts foot pedal upon the penultimate machine beep.
- Technologist sets device to lavage mode.
- Radiologist rotates the needle slowly to allow adequate lavage at all clock faces.
- Technologist removes biopsy samples from device, places them in a tray, and obtains a specimen radiograph.
- Radiologist confirms adequate tissue sampling (Figure 5).
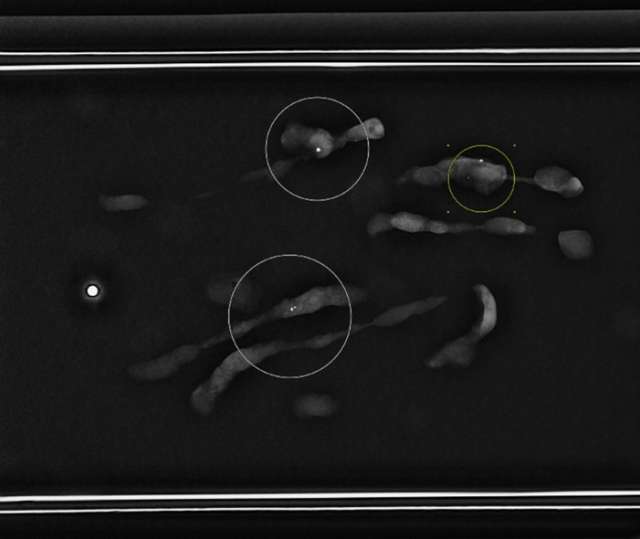
Figure 5. Specimen radiograph demonstrates multiple tissue samples containing calcifications (circled).
- Radiologist removes biopsy needle, while leaving the introducer in place, and deploys biopsy marker through the introducer using standard technique.
- Radiologist manually pulls back stereotactic device by approximately 1 cm.
- Technologist takes single radiograph to demonstrate deployment of biopsy marker (Figure 6).
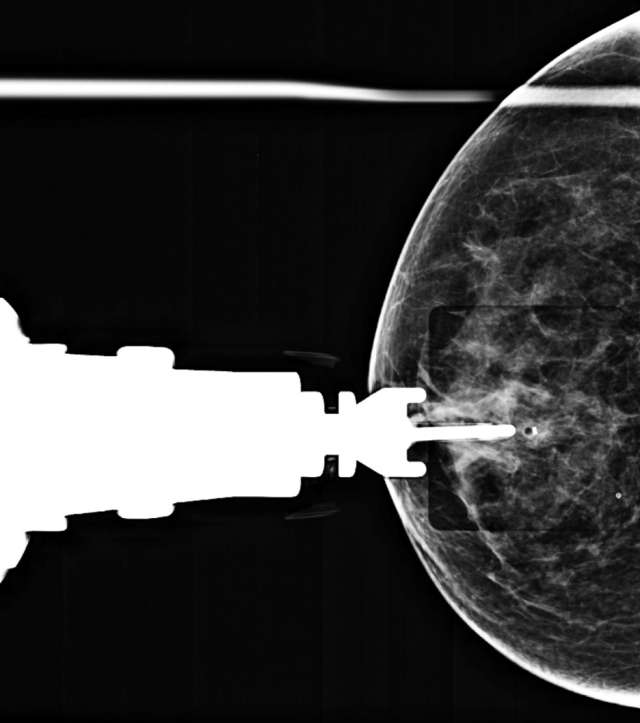
Figure 6. CC radiograph demonstrates post-biopsy changes and marker deployment.
- Radiologist completely removes introducer from the patient’s breast and achieves hemostasis with manual compression.
- Technologist releases patient’s breast from compression.
Step 5: Post-Biopsy
- Technologist takes 2D or 3D mammograms in CC and ML views (Figure 7).
- Radiologist evaluates for adequate biopsy marker placement.
- Patient is provided with verbal and written after care instructions and sent home.
- Tissue samples are packaged appropriately and sent for histological analysis.
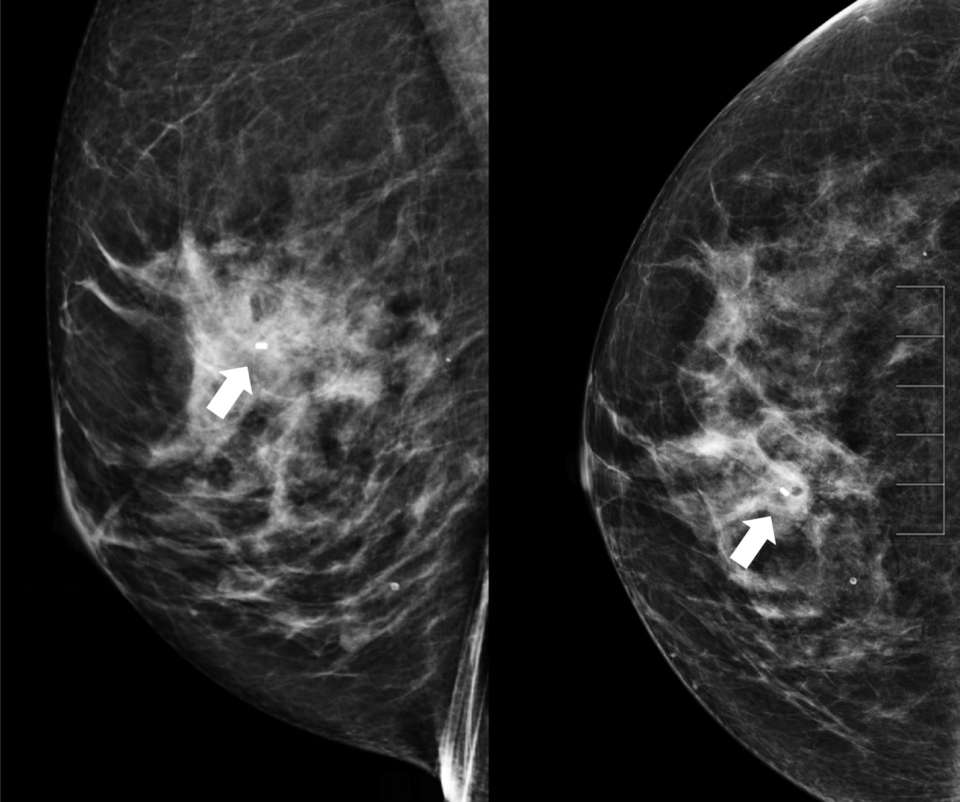
Figure 7. Post-procedure ML (left) and CC (right) images demonstrate good biopsy marker placement (arrow).
References:
- Ames V, Britton PD. "Stereotactically Guided Breast Biopsy: A Review." Insights Imaging. 2011 Apr;2(2):171-176. . Epub 2011 Jan 20. PMID: 22347945; PMCID: PMC3259391.